Configuration - SSO (Single Sign-On)
Below is a description of the process for configuring SSO (Single Sign-On) on NDD Print Portal 360 Server, including downloads, installation, adjustments, and final considerations.
Important
Ensure that all requirements have been met, including the minimum system version 5.65.13.
Pre-configuration
As this is a technically more complex integration, it is important to consider a few points before starting the process. Below are the main aspects that should be checked before beginning the configuration:
Authentication cache: Some browsers may cache login failures, requiring a restart or cache clearing.
HTTPS: The portal and API must use the same protocol (HTTP or HTTPS) and valid certificates.
Domain: The server must be in the company domain.
Popup language: Depends on the operating system, not on NDD Print Portal 360.
Permissions: Users created via SSO have minimum permissions by default.
Domain name: The user will be displayed as DomainName\username.
Default password: Format: company:logonname (max. 30 characters, truncated if exceeded).
Configuration keys: The SSOTokenIssuer, SSOTokenAudienceID, and SSOTokenSecret keys must have the same value in the API and Portal.
SSO API download
Download the SSO API using one of the links below (provisional links):
Copy the sso-api folder to the directory:
..\NDD\nddPrint\Server\Webs
Configuration
Installing the CORS module in IIS
If the IIS CORS module is not installed, follow the instructions below. If the CORS module is already installed on the server, proceed to step 3.
Download the version compatible with your environment: https://www.iis.net/downloads/microsoft/iis-cors-module .
Run the installation.
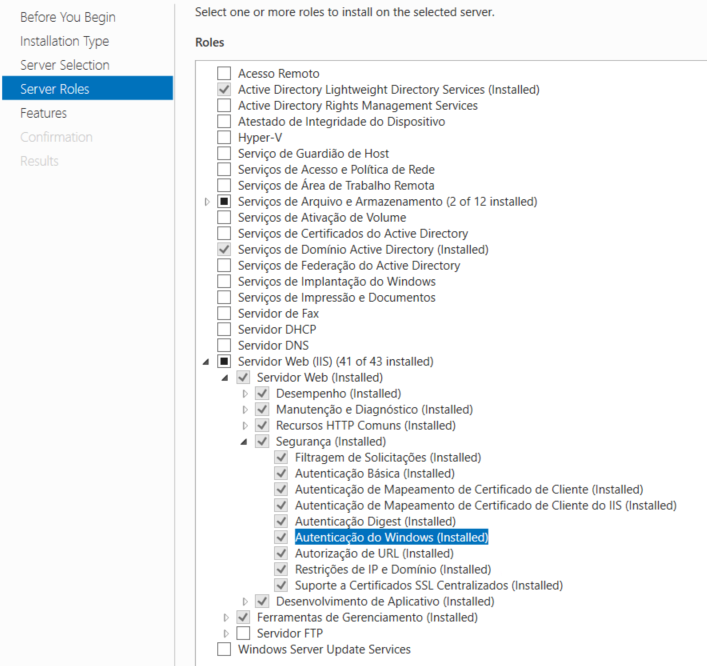
Enable Windows Authentication
On the server that will host the application:
Access Windows features and enable Windows Authentication in IIS.
Confirm that the option is enabled correctly.
Site Configuration in IIS
Creating the Application Pool
Open IIS Manager. To do this, press Win + R, type inetmgr and press Enter.
In the left pane, click Application Pools.
On the right, click Add Application Pool….
Set:
Name: 360Sso.nddprint.com
.NET CLR Version: v4.0
Managed pipeline mode: Integrated
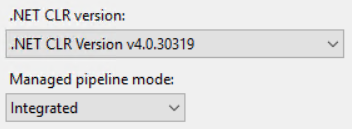
Click OK.
Creating the Site
This step describes how to create the site responsible for hosting the SSO API.
Summary of website creation
Creating a website called 360 SSO API
Association with the created pool
Pointing to the extracted API folder
Below are detailed instructions on how to create the website:
Open IIS Manager
On the server, press Win + R, type inetmgr, and press Enter.
Start creating the website
In the left pane, right-click on the Websites folder and select Add Website....
Fill in the website information In the window that opens, configure:
Website name: 360 SSO API (This name is only for identification in IIS, but we recommend using exactly this one to maintain the standard and facilitate future maintenance)
Application pool: select the pool created in the previous step (
360Sso.nddprint.com).Physical path: click ..." and select the folder where the SSO API was extracted. Example path: C:\NDD\nddPrint\Server\Webs\sso-api
Binding configuration
Type: HTTP (or HTTPS, if using a valid certificate).
IP address: All Unassigned (or the specific IP of the server, if applicable).
Port: set a free port (e.g., 8082) to avoid conflicts with other sites.
Host name: can be left blank unless you are using internal DNS.
Finish creation
Click OK to create the site.
In the right pane of IIS, click Start to activate it.
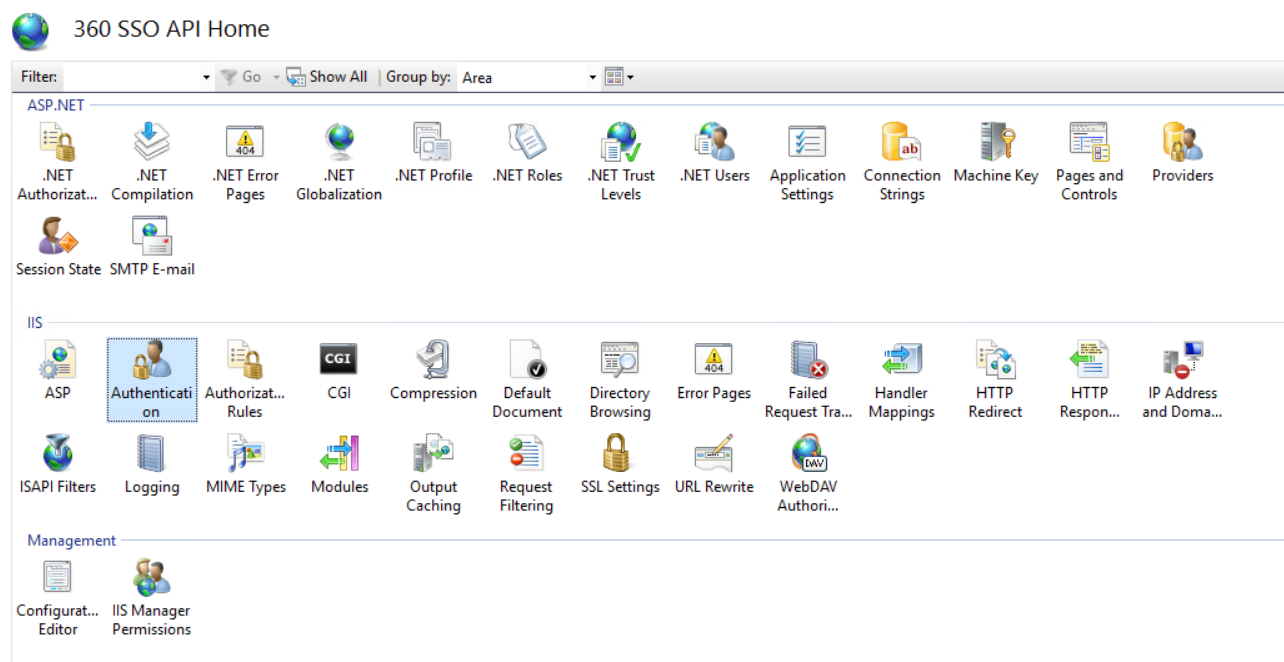
Authentication Configuration
Access the Authentication (Authetication) module on the 360 SSO API website.
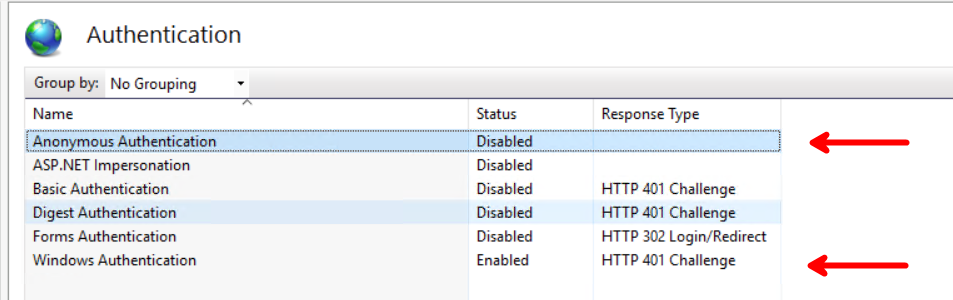
Disable Anonymous Authentication (Anonymous Authentication) and enable Windows Authentication (Windows Authentication).
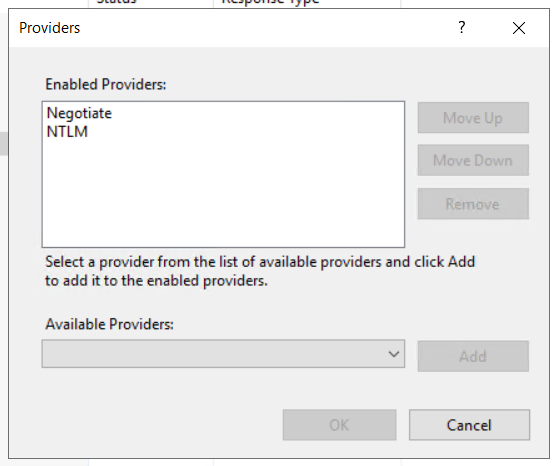
With Windows Authentication (Windows Authentication) selected, go to the Providers action:

Ensure that the providers are in the order below:
SSO API Settings
Configuring CORS
In the API's web.config file, which can be found in ....\NDD\nddPrint\Server\Webs\sso-api, locate the <system.webServer> section and add the content below:
<cors enabled="true" failUnlistedOrigins="true">
  <add origin="http://origem-permitida" allowCredentials="true" maxAge="172800">
    <allowHeaders allowAllRequestedHeaders="true" />
    <allowMethods>
      <add method="GET" />
      <add method="POST" />
      <add method="PUT" />
      <add method="DELETE" />
      <add method="OPTIONS" />
    </allowMethods>
  </add>
</cors>
Replace http://origem-permitida with the URL of Portal 360.
Example:
<add origin="http://br-hmg-print01:8081" allowCredentials="true" maxAge="172800">
The IIS CORS module must be installed. Otherwise, IIS will display an XML schema error when reading <cors> in web.config
Configuration in NDD Print Portal 360
web.config file
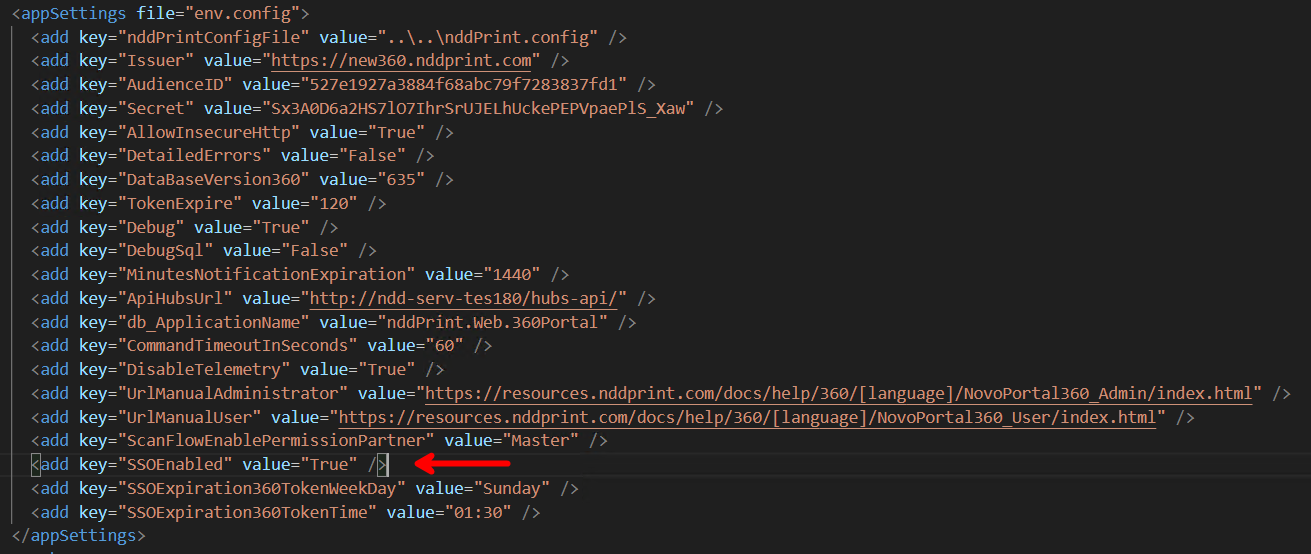
In the 360Portal directory (...\NDD\nddPrint\Server\Webs\360Portal), change the SSOEnabled key in web.config as follows:
Key: <add key="SSOEnabled" value="true" />
.env file
After changing the web.config file, locate the .env file in the path: ...\NDD\nddPrint\Server\Webs\360Portal\assets\config, where you will find a structure as shown below:
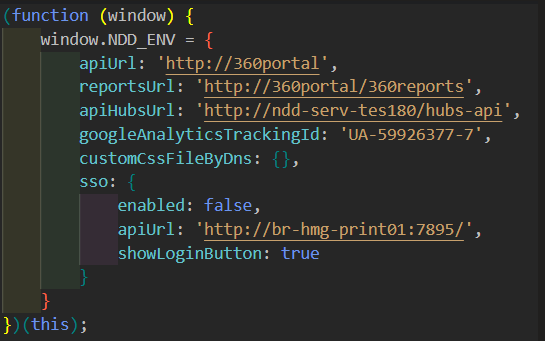
Edit the .env file as requested below:
Set enabled to true in the SSO section.
Configure apiUrl with the SSO API address.
The other keys in the file (with the other addresses) must also be configured.
Initialising the Pools
Open IIS Manager
On the server, press Win + R, type inetmgr and press Enter.
Locate the application pools
In the left pane, click Application Pools.
Locate and select the pools:
Portal 360
360Sso.nddprint.com (or the name defined during creation).
Starting the pools
Right-click on each pool and select Start.
Verify that the status has changed to Started.
Locating the sites
In the left pane, click Sites and locate:
Portal 360
360 SSO API.
Starting the sites
Right-click on each site and select Start.
Confirm that the site icon appears with active status (green icon).
Testing availability
In your browser, access the Portal 360 and SSO API URLs to confirm that both are operating correctly.