Installation process
Run the NDD Print Remote Operation Ricoh tool
Check the desired app options (NDD Print Client and/or NDD Print Client Collector)
Click OK.
Add Equipment
Go to File
Add;
Address: enter the printer address (IP or Hostname) where the NDD Print solution will be installed;
WIM Admin: enter the printer administrator username;
Password: enter the printer administrator password;
Https: select the desired communication method (HTTP, HTTPS or Both)
Remote Install Password: enter the password defined on Web Installation Settings;
Click OK.
Right-click on the equipment;
Click Initialize.
If the password is not set, do not fill in the Remote Install Password field.
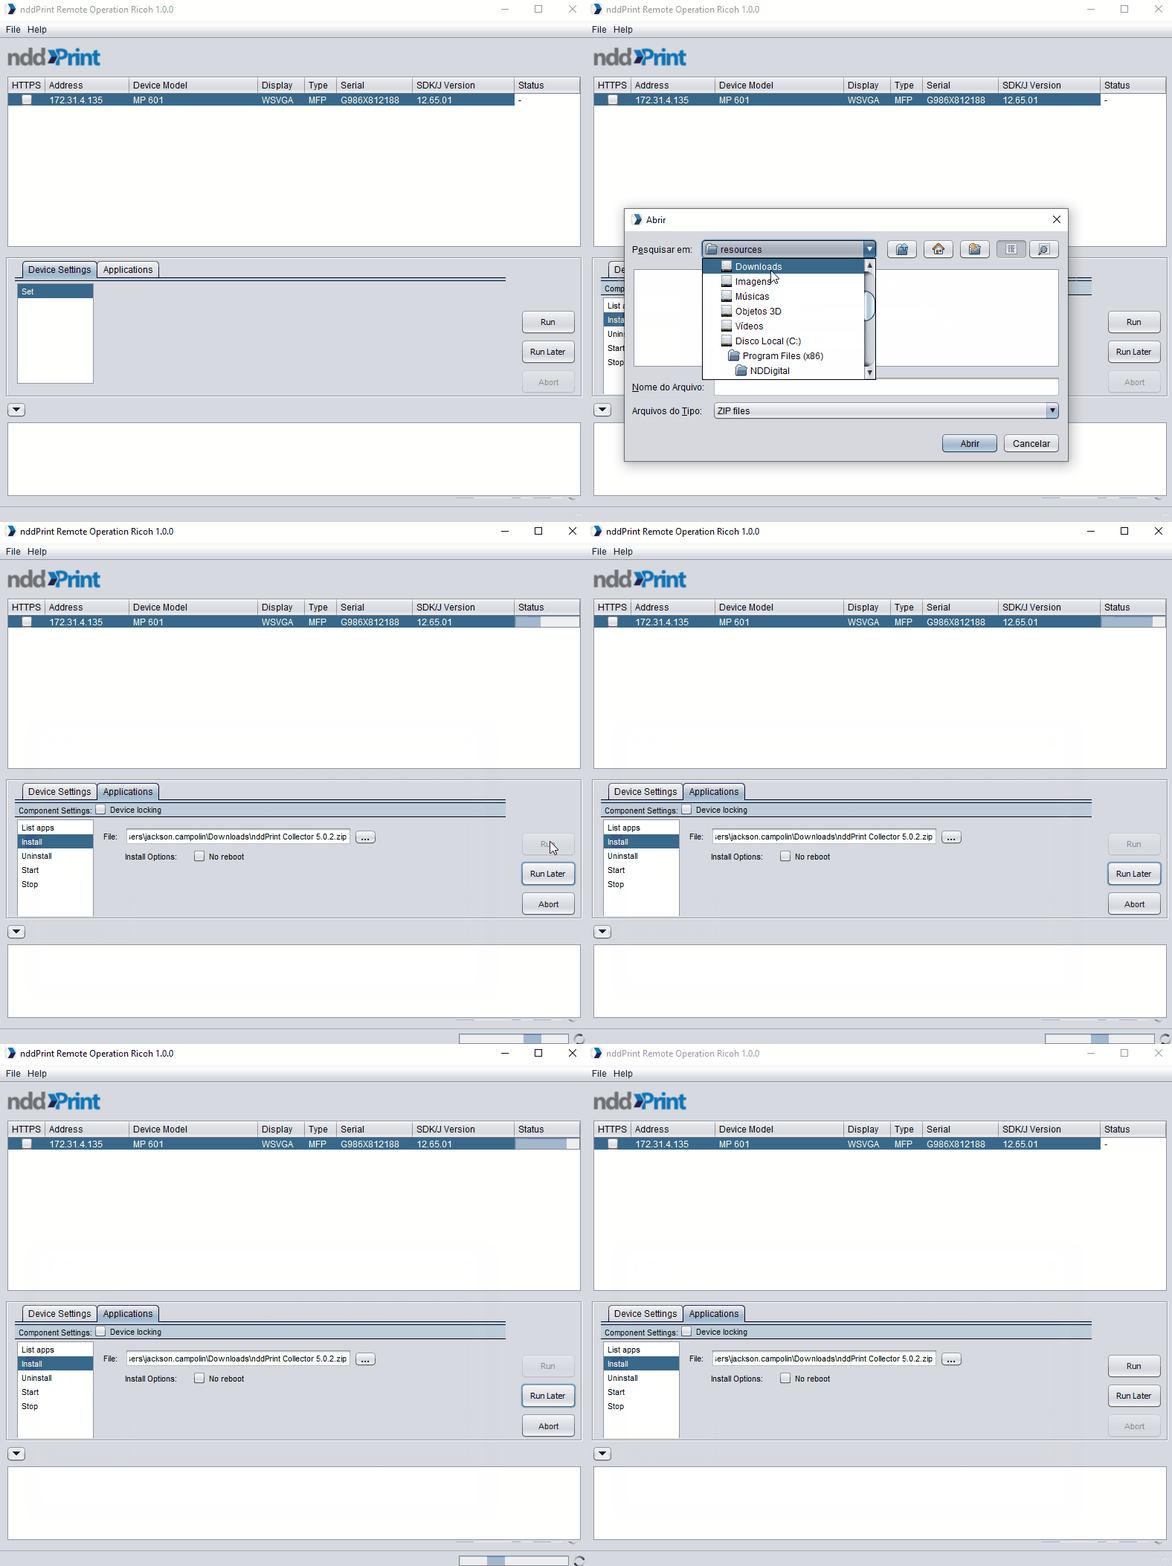
Prepare the equipment
Select the desired printer;
Go to Device Settings
Select Set;
Click Run;
Wait for the preparation process to finish.

Prepare
Install application
Before beginning the NDD Print Client application installation process, it is needed to prepare the selected printer for the installation.
Select the desired printer;
Go to Applications > Install;
Select installation file;
Click Run;
Wait for the installation process to finish.

Install
The preparation and installation process results are reported in the field Show logs or accessing the folder Debug Logs (File > Settings > Debug Logs);
Depending on the amount of printer, preparation/installation process may be slow. To minimize this possible slowness, it is possible to limit the number of processes (number of printer that will go through the preparation/installation process) by accessing the path File > Settings > Max Threads;
Printer list may be exported for future use (File > Export lst file).
