Settings via ECT
Add printer
Create a file (.CSV format) containing information about the printers that will be configured. Printers should be listed as shown below.
IP_or_Hostname;
IP_or_Hostname;
IP_or_Hostname;
IP_or_Hostname;
Click Import file
Select the .CSV file containing the list of printers
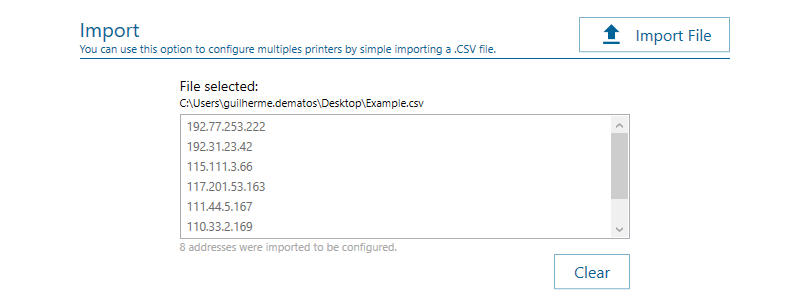
printer list import example
Add a single printer
If you want to configure just one printer, enter the following data:
Address: enter the printer address (IP address or Hostname).
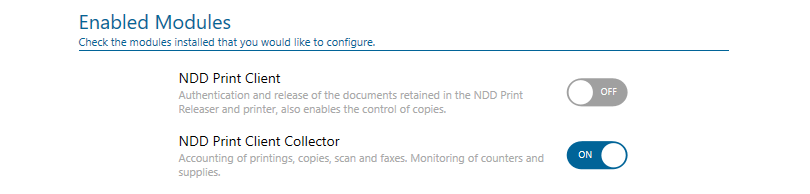
Enable module
Enable the NDD Print Client Collector option and fill in the required fields before sending these settings to the desired printer(s).
Due to limitations in the HP SDK, accounting may change in cases where sequential jobs are sent to print with a short period of time.
NDD Print Client Collector
General settings

Configuration example
Default Domain: enter the default domain assigned to the jobs that its domain was not identified;
Sending Time: enter the time interval value (in hours), where the data captured by the NDD Print Client Collector will be sent to the server (Host, MPS/360 or Orbix).
Application Color: select the predominant color of the application;
Application Logo: set an image to be shown as an icon on the equipment panel;
Enable Agent monitoring: activates the “agent monitoring” feature of NDD Orbix.
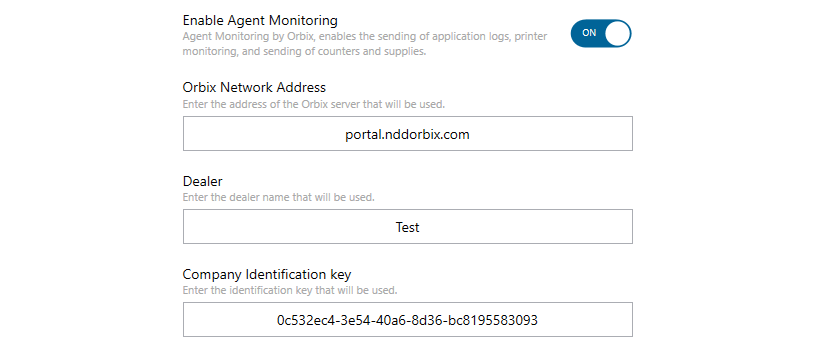
Configuration example
- Orbix Network Address: address where monitoring data will be sent;
- Dealer: inform the name of the NDD partner;
- Company Identification key: enter the identification key provided by NDD.
Due to limitations of the HP firmware, if the printer is configured with the time zone in daylight saving time (DST), there will be a delay of 1 (one) hour between sending (NDD Print Client Collector) and receiving the logs (NDD Orbix).
As an alternative, you can manually configure the printer's time zone by adding 1 (one) hour in the time zone field to compensate.
Server
Primary server
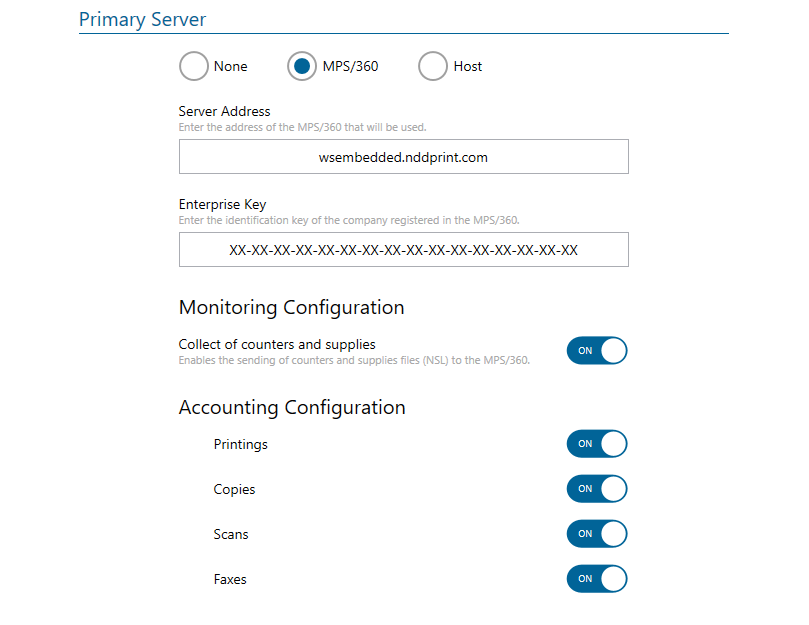
configuration example
Server Address: enter the Datacenter address (cloud);
Addresses of NDD Data Centers:
Global Data Center: wsembedded.nddprint.com;
Data Center Europe: wsembedded-eu.nddprint.com;
Data Center United States: wsembedded-us.nddprint.com.
Enterprise Key: enter the key provided by NDD sales department;
Monitoring Configuration
Collect of counters and supplies: it enables the capture and sending of printer counter and supply data.
Accounting Configuration
Printings: it enables event collection of printing jobs;
Copies: it enables event collection of copy jobs;
Scans: it enables event collection of scan jobs;
Faxes: it enables event collection of fax jobs;
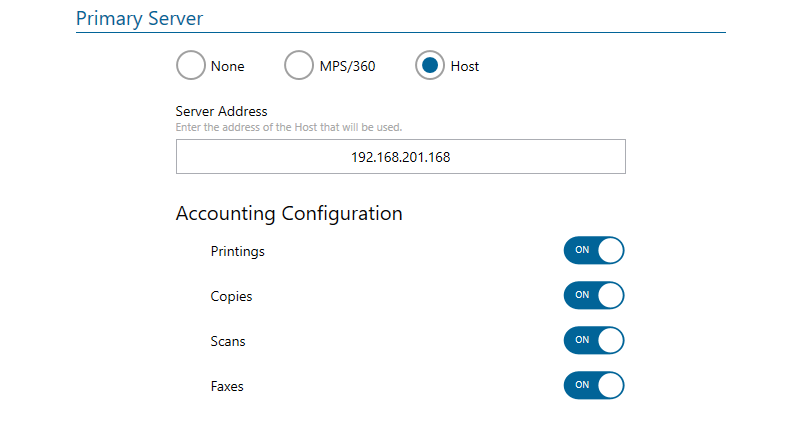
Configuration example
Server Address: enter the address (IP or Hostname) of the Host server;
Accounting Configuration
Printings: it enables event collection of printing jobs;
Copies: it enables event collection of copy jobs;
Scans: it enables event collection of scan jobs;
Faxes: it enables event collection of fax jobs;
Secondary server
To use the secondary server, enable the “Enable Secondary Server” option.
On the secondary server, it is only possible to send data from “counters and supplies” and “events”.

Configuration example
Server Address: enter the Datacenter address (cloud);
Addresses of NDD Data Centers:
Global Data Center: wsembedded.nddprint.com;
Data Center Europe: wsembedded-eu.nddprint.com;
Data Center United States: wsembedded-us.nddprint.com.
Enterprise Key: enter the key provided by NDD sales department;
Monitoring Configuration
Collect of counters and supplies: it enables the capture and sending of printer counter and supply data.

Configuration example
Monitoring Configuration
Collect of counters and supplies: it enables the capture and sending of printer counter and supply data.
Security

NDD Print Settings Password: password to access the settings of the NDD Print Client Collector module via the equipment interface (default 1111).
For more security, we recommend changing this password.
Export configuration file in JSON
In cases where there is no communication between the printers and the ECT, we can export the configuration file and save it on a USB device to be loaded in the configurations via printer's panel.