Add Printer
Changing Brother device default settings
In newer models, some options are enabled by default, which may cause errors when adding the device to NDD Print MF Brother.
In environments with such models, it will be necessary to adjust two factory default settings related to SNMP and HTTP Server to ensure proper communication with the solution.
1. Change SNMP access
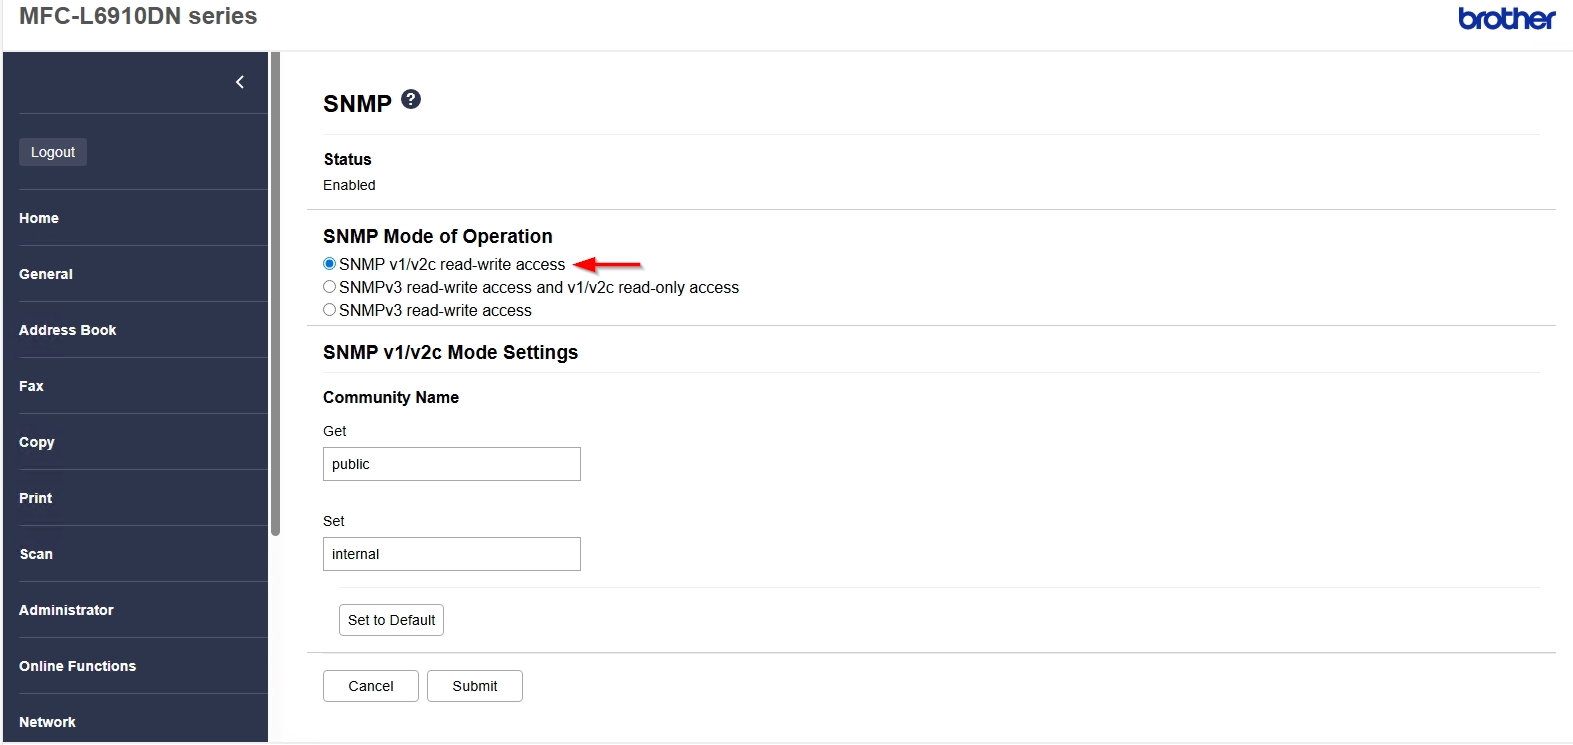
By default, the printer is configured with the option ‘SNMP v3 read/write access and v1/v2c read-only access’. This setting must be changed to ‘SNMP v1/v2c read/write access’.
Instructions:
Access the printer's web interface through your browser by entering the device's IP address.
Log in with your administrator credentials.
In the side menu, click Network.
Select the Protocol option.
Click SNMP.
Locate the SNMP Mode of Operation field.
Change from ‘SNMPv3 read-write access and v1/v2c read-only access’ to ‘SNMP v1/v2c read-write access’.
Click Submit to save the changes.
2. Uncheck HTTPS redirection
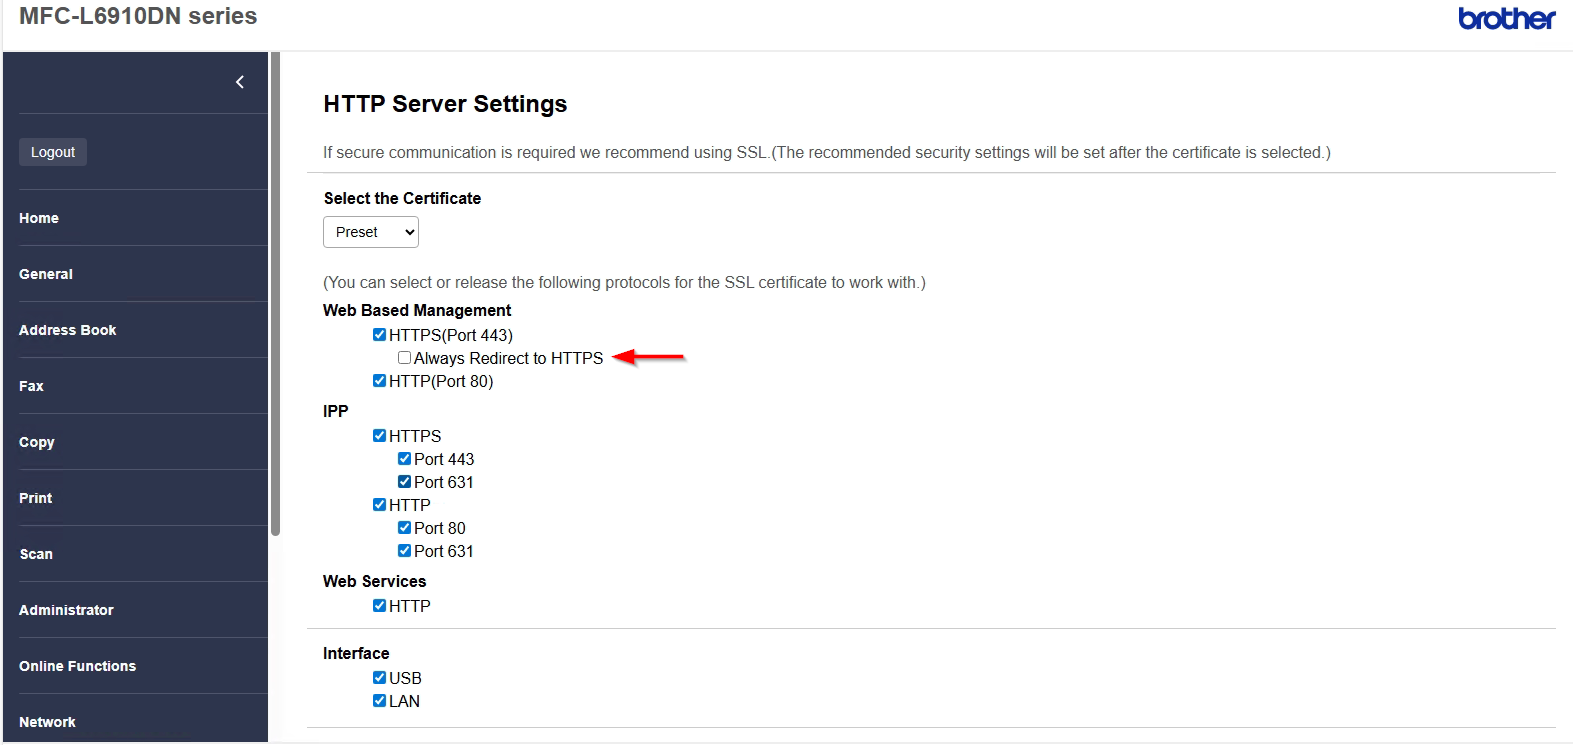
By default, within the HTTP server settings, the option ‘Always redirect to HTTPS’ is checked. For proper operation, this option must be unchecked.
Instructions:
Still in the printer's web interface, go to the Network menu.
Click HTTP Server.
Locate the Web Based Management field.
In the Always redirect to HTTPS option, uncheck the checkbox.
Click Submit to apply the changes.
The steps described above may vary depending on the firmware version of the device.
To illustrate the result of the steps described above, below are screenshots showing the changes made.
Example model in the illustrations: Brother MFC-L6910DN
SNMP:
 (Click on the icon to view image)
HTTP Server Settings:
 (Click on the icon to view image)
Adding printers
After performing the initial settings, add the printers in the nddPrint MF Brother interface, so that they start to have their jobs monitored.
Click the Add Printer icon to open the Wizard.
Fill in the fields: IP Address or printer's name and SNMP Community. The SNMP community must be the same as configured in the printer, so the software can communicate with the device. Enter the user name and password to access the printers web page.
In the nddPrint Client option, select if it will use Authentication or Authentication and Releaser in the device. Click Next to continue.
The capture of copy and scan logs via BSI will only occur in models that have this feature, and for that, you must add the printer with NDD Print authentication enabled.
Wait while the addition is concluded.
Click Finish to close the Wizard.
IMPORTANT
Due to software/hardware limitations in fome Brother devices, some procedures may not occur as expected, causing internal errors during the installation. It's recommended that the printers is not being used, neither there are users logged in it's panel.
If any error occurs during the configuration steps, verify what is causing it and use the device's documentation to regulate the situation before trying again.
BSI activation depends on the manufacturer's own software. In case of failure when adding the equipment, use the BSI activation tool located in the product's installation folder.
After adding the printer to the MF with the embedded NDD Print active, the server addresses cannot be changed in the MF interface, since they are configured in the printer itself. To change addresses, you must remove all printers and add them again.
