Configuring the Profile (access control) of HP printers
In this article, you will learn how to configure access control when the printer is added to NDD Print MF HP using the Control by device profile.
Before you start
This configuration should only be carried out after adding the device to NDD Print MF HP.
If the printer has been added to use the Releaser (Secure Document Release) functionality, blocking the NDD Print 360 application is mandatory.
If the printer has been added to use the Quota on copies feature, locking the Copies application is mandatory.
Setting the function lock
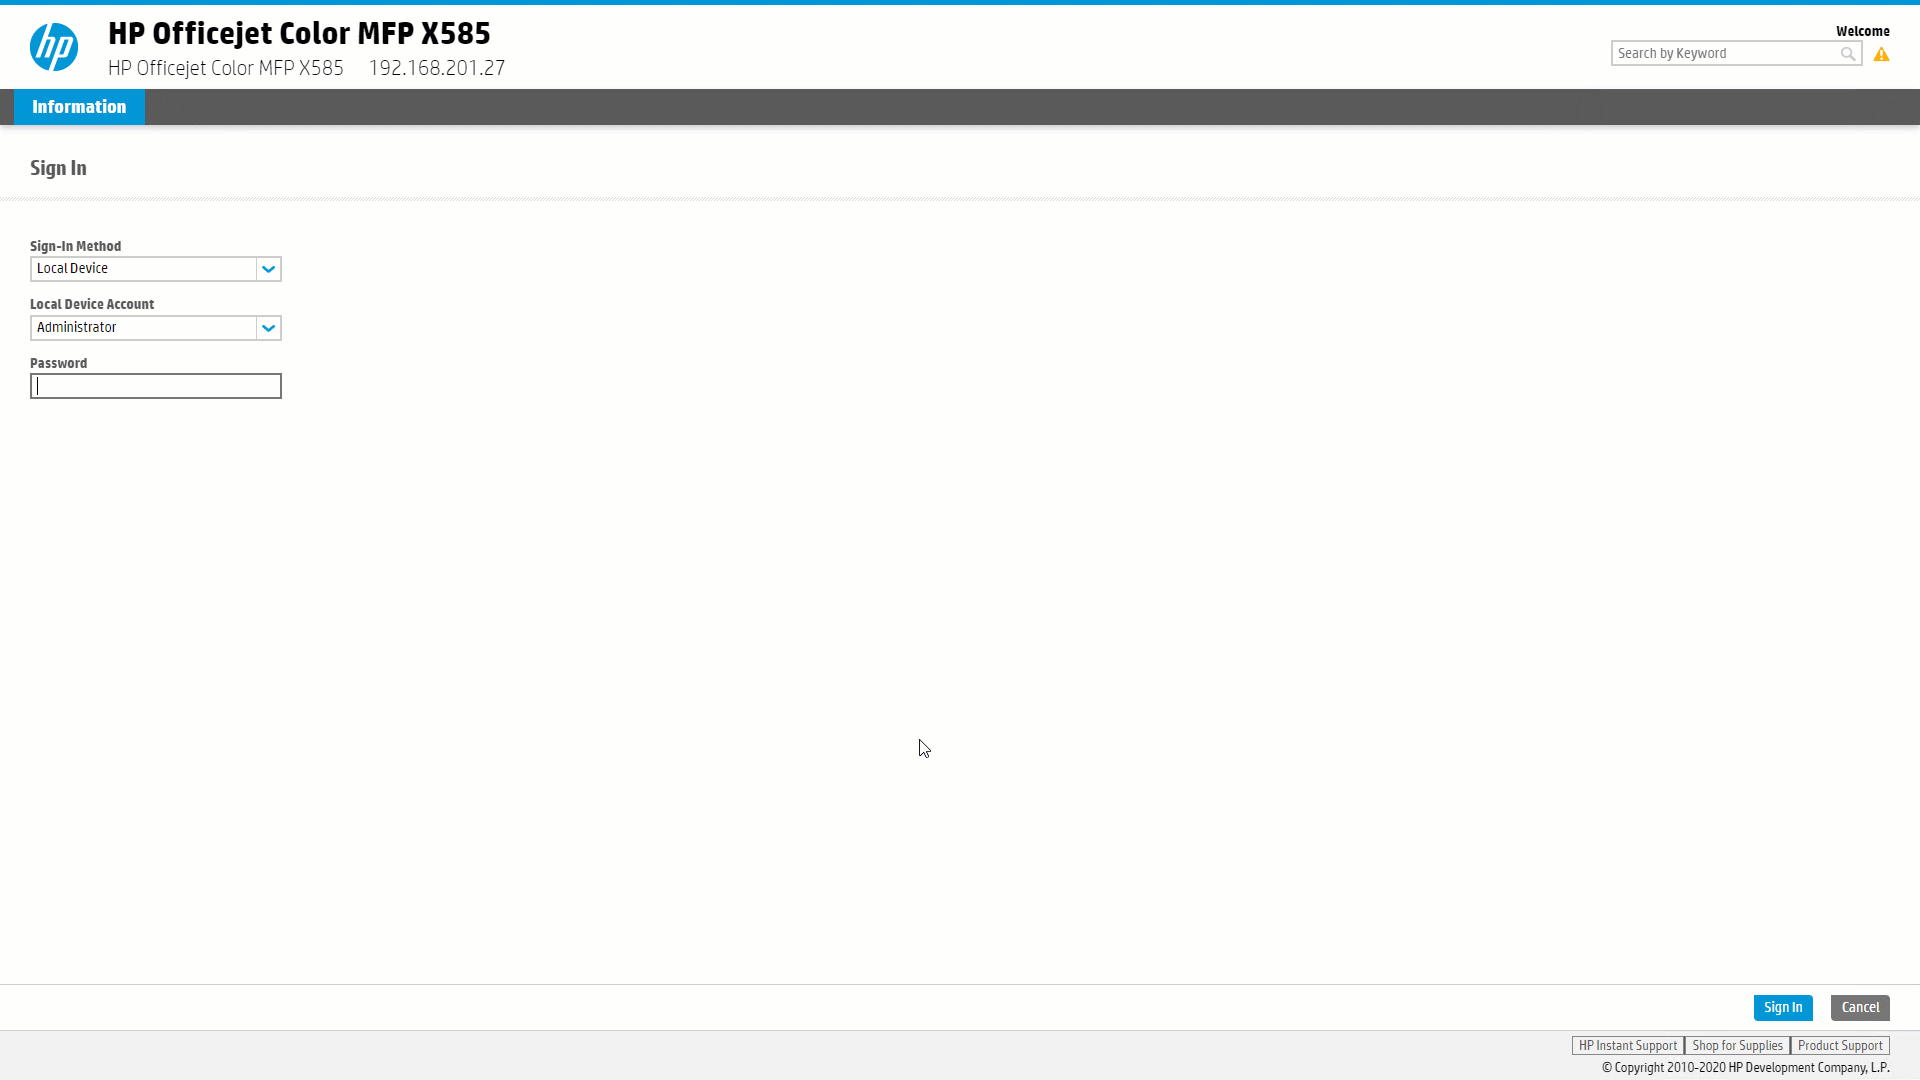
Access the device's web page
Go to Security > Access control
Under Permission and login policies, in the Login method column (top of the list), choose NDD Print Client
In the Device guest column, choose the functions that will be blocked
Click on the icon
 until it changes to
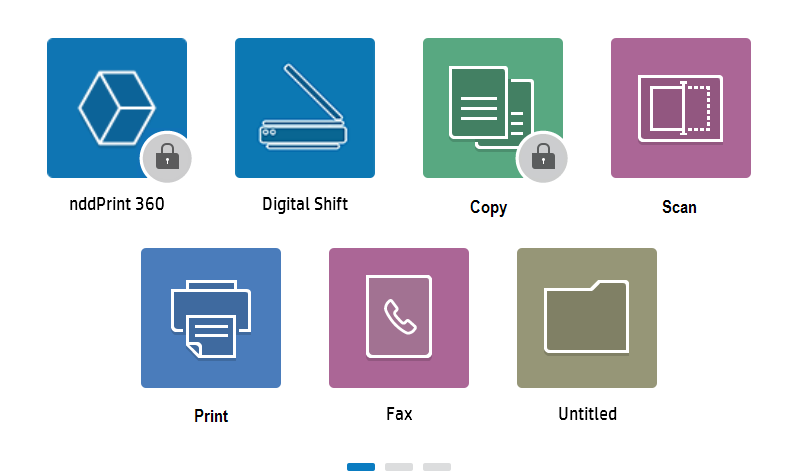
  . Here's an example:
We have locked ![]() the NDD Print 360 and Copy applications. The device's screen will show the application with a padlock:
the NDD Print 360 and Copy applications. The device's screen will show the application with a padlock:
Click on Apply
To completely lock the device's screen, simply select all the applications in the list.