Other NDD Print MF HP settings
NDD Print MF HP has other settings that make it easier to use and administer.
To access the settings
Open the NDD Print MF HP interface
In the menu, click on Tools > Settings

Accounting tab
Differentiated user login identification: If you use an ERP system, configure the delimiters to identify the user who sent the printout through the document title. Here's an example:
@@john@@doc.txt
In this example, the user will be registered as john and the document name as doc.txt
Display tab
Language: Select the language that will be displayed in the NDD Print MF HP administration interface and in the interface of the solution embedded in the device (NDD Print Client HP).
If you select French, Italian or Catalan only the interface of the embedded solution will be displayed in these languages, the administration interface of NDD Print MF HP will be displayed in English.
Application name: Name that will be displayed on the printer panel.
It is not recommended to use special characters.
Application icon: Image that will be shown as an icon on the device panel.
The image must be 96 x 96 pixels in .png format.
Authentication tab
General
Server address: This setting is filled in with the IP address where the NDD Print MF HP is installed. This address is registered in the settings of the added devices, and if you use more than one network card (primary internal network card and secondary VPN card), this IP must be the one through which the device will communicate with the server.
If you change the server address, the printers will be reconfigured and may be unavailable during this period.
Conversion to hexadecimal: In some RFID card models used in some USB readers, it is necessary to enable this option.
Document release behavior: This option is used so that the user's pending documents are released immediately after authentication.
NDD HP Printer Deploy
Password definition
Whether you are accessing the NDD HP Printer Deploy portal or via an application installed on an HP device, you will need a password to log in.
On this screen, it can be set, provided that the complexity criteria are respected.
It is not possible to recover or create multiple passwords for multiple users. If the password is lost, a new one will have to be generated to replace the previous one.
Addition profiles tab
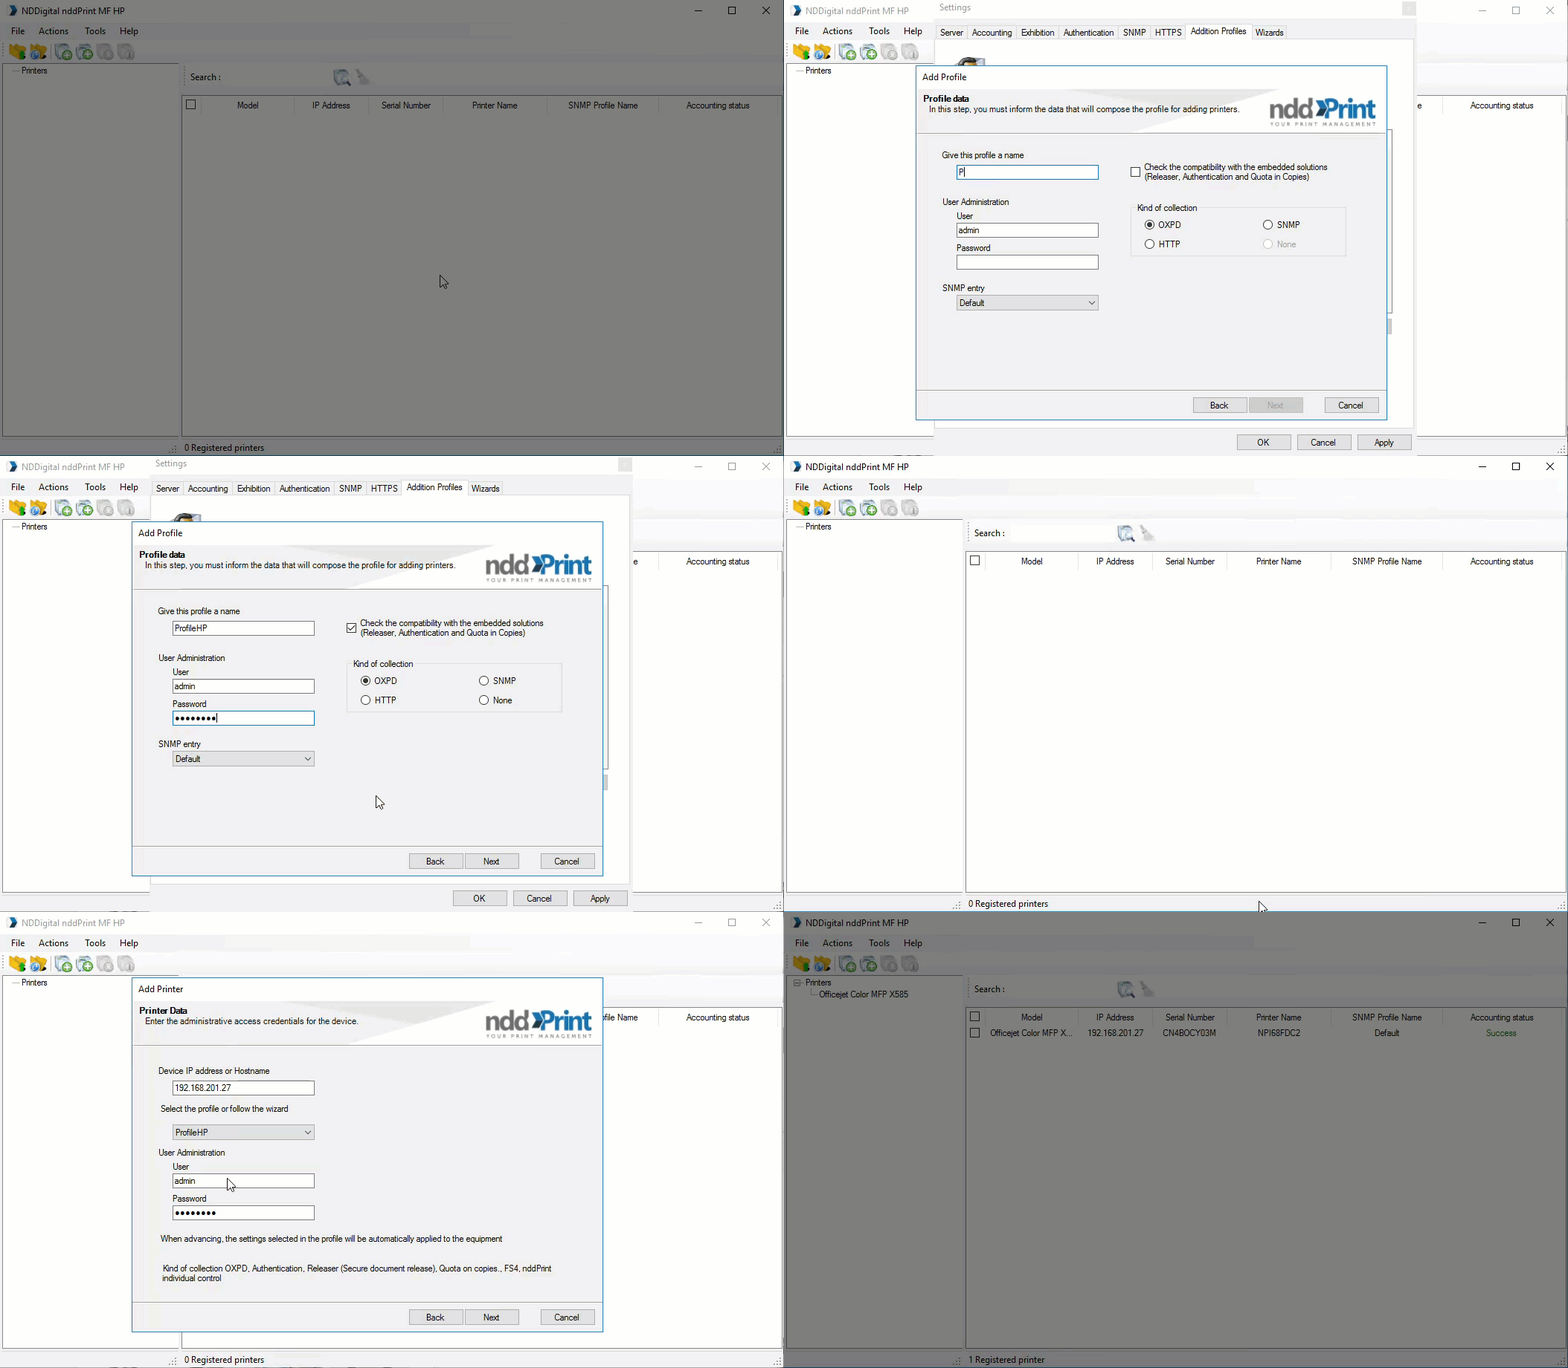
In this tab, we can create specific profiles that help optimize the addition of equipment.
Click on Add
An interface for creating profiles will appear, click Next to continue
Enter the profile data
Profile name
Administration user for the devices that can use this profile
Administration password for the devices that can use this profile
Standard SNMP input used by the devices that can use this profile
Now it's time to configure the profile to use the Accounting, Authentication, Secure Release and/or Copy Quota features.
After defining the settings, click Next
Click on Finish

Wizards tab
This setting makes it possible to determine the presentation of wizards according to each action performed in NDD Print MF HP. Disabling some of them can help optimize administration time.
Available wizards
Add printer wizard
Reconfigure printer wizard
Delete printer wizard
Add printers en masse wizard
This screen will always be displayed if the addition of one or more printers fails.
Add profile wizard
Edit profile wizard
Advanced settings
In addition to the interface settings, NDD Print MF HP allows you to make a number of changes.
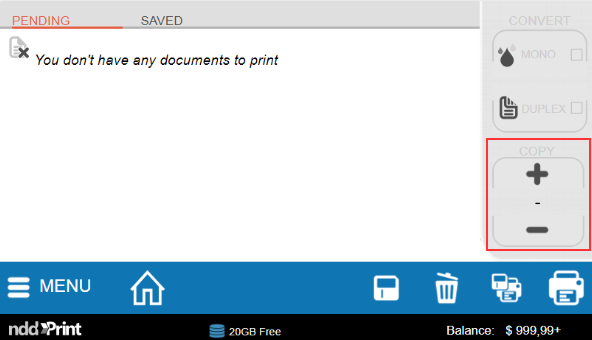
Disable the number of copies option
This feature allows the number of copies to be locked in the NDD Print Client panel.

Before you start
The configuration will be applied to all printers registered with NDD Print MF HP.
Go to the Windows registry
Navigate to the address
Computer\HKEY_LOCAL_MACHINE\SOFTWARE\NDDigital\nddPrint\MF\HPCreate a new REG_SZ key with the name
DisableCopyNumberSelectionFromClientFill in the key value as
TrueClick OK
To re-enable the number of copies option, simply change the key to 0 or remove it.
Configuring the client (printer) address in Network Load Balancing (NLB) environments
Use the features of the HP NDD Print Client in Network Load Balancing (NLB) environments.
Before you start
You must have the name of the client's IP key configured in the NLB.
Access the Windows registry
Go to the address
Computer\HKEY_LOCAL_MACHINE\SOFTWARE\NDDigital\nddPrint\MF\HPCreate a new key of type String value with the name
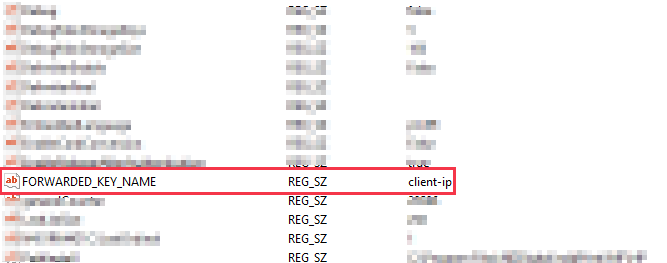
FORWARDED_KEY_NAMEFill in the key value with the name of the client IP key configured in the NLB
Click OK
In the example below, the key name has been set to client-ip


