Scenario using NDD Print Host
The main objective of NDD Print Gateway is to connect Clients with the Data Center, therefore, it is necessary to configure them so that they can communicate with NDD Print Gateway.
Below you can see a scenario with the NDD Print Host configured to send to the NDD Global Data Center.
Scenario
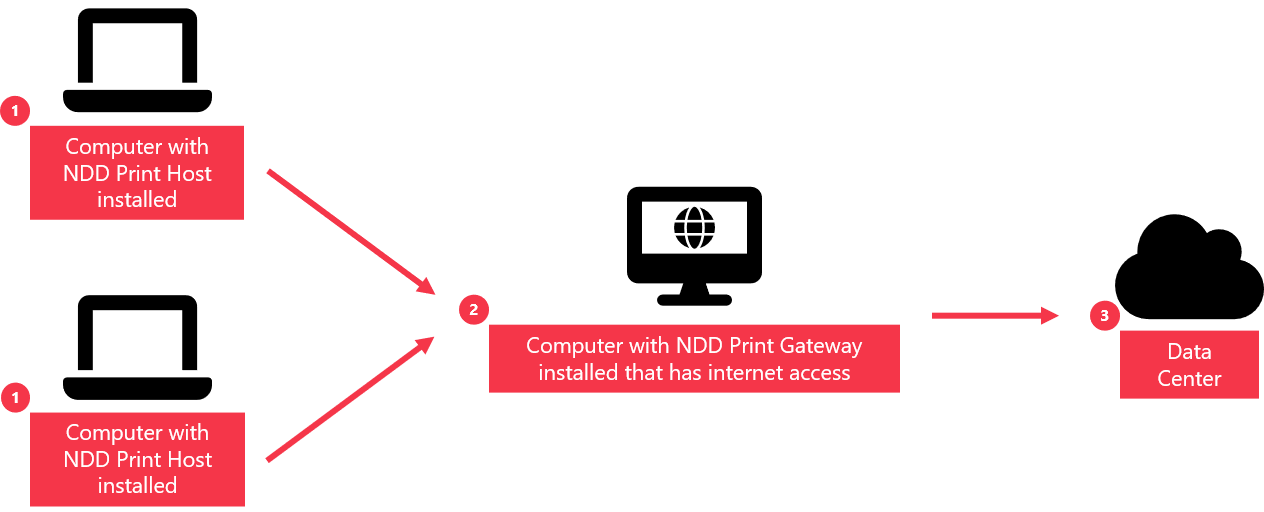
Computers without internet access and with NDD Print Host installed and configured to send the data to the NDD Global Data Center;
Computer with NDD Print Gateway installed and configured, which has internet access;
NDD Global Data Center.
Configuration
1.First we configure the NDD Print Gateway. To do this, follow the steps below:
Port: In this scenario, we will use Port 56580 for <%HOST%> to make the connection;
Addresses: Here we will register the NDD Global Data center Web Services.
Now let's configure the NDD Print Host to communicate with the NDD Print Gateway. To do this, follow the steps below:
Open the NDD Print Host;
Go to Tools tab > Internet group > Proxy configuration action;
Check the Use Proxy to communicate with NDD Print servers;
Inform the address (IP or Hostname) of the computer with NDD Print Gateway installed and the port, in our scenario we use Port 56580;
If authentication is required on the server with NDD Print Gateway installed, check the Authentication on the Proxy is required and fill in the data;
Login: User login to perform authentication;
Domain (optional): Authentication domain;
Password: User password configured;
Confirm password: Confirm the configured user password;
Click Apply to complete the configuration;
Use Test Connection button to have NDD Print Host do a communication with the computer NDD Print Gateway installed.