Configure the secondary server (contingency)
In this article, you'll learn how to configure the secondary server for contingency in the event of a communication failure with the primary server.
How does contingency work?
In cases where the primary server has a communication problem, the printer will automatically try to connect to the secondary server. This way, the Authentication and Secure Release functionalities will continue to work.
Before you start
Only new printers will receive the configuration from the secondary server; for printers that have already been added, you will have to re-register them.
Make sure you have installed and configured NDD Print MF Epson on the secondary server.
Make sure you add the printer to NDD Print MF Epson on the secondary server.
Setting up the secondary server
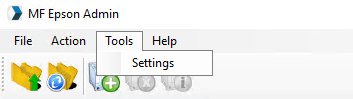
Open the Epson NDD Print MF interface
In the menu, click on Tools > Settings
Go to the Authentication tab
Fill in the Secondary server address
From now on, all new printers will receive the configuration from the secondary server.
You can Import printers into NDD Print MF Epson for mass re-registration.