Microsoft Entra ID
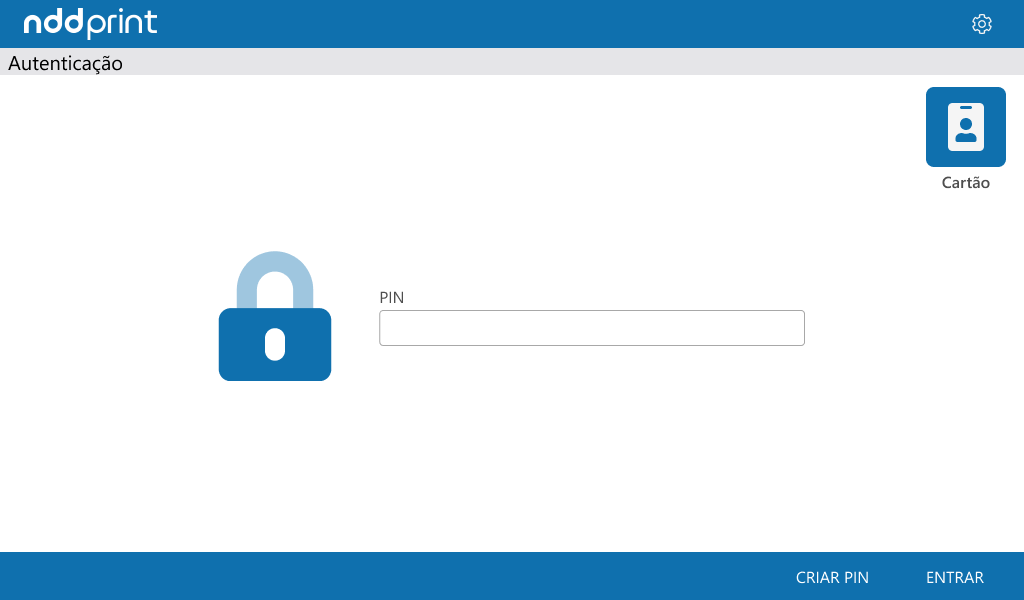
Currently, there are three methods available for authentication in our embedded solutions: User and Password, PIN, and Physical Identifier. However, when you choose to integrate a Microsoft Entra ID domain, only the PIN and Physical Identifier options will be available for authentication.
Below, we will describe how to register the PIN and physical identifier, in addition to the additional security verification required by Microsoft.
Important note:
To use integration with Microsoft Entra ID domains, the NDD Print Host module must be at least version 5.62.3.


Physical identifier
Information about the mandatory attributes required to continue with the registration process.
PIN Registration
To start the process of creating a PIN with the Microsoft Entra ID domain, on the printer screen:
Access the Client application
Open the NDD Print Client installed on the printer
Navigate to the ‘Create PIN’ option
Domain Selection
Choose the domain where the PIN will be created.
Click ‘Continue’
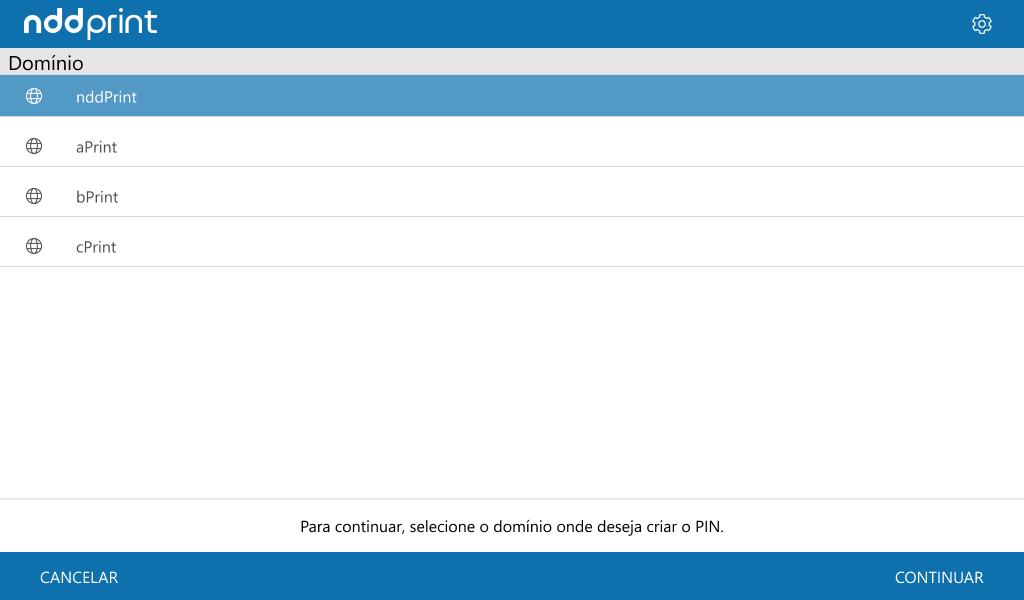
If there is only one domain Microsoft Entra ID, no screen will be displayed for domain selection.
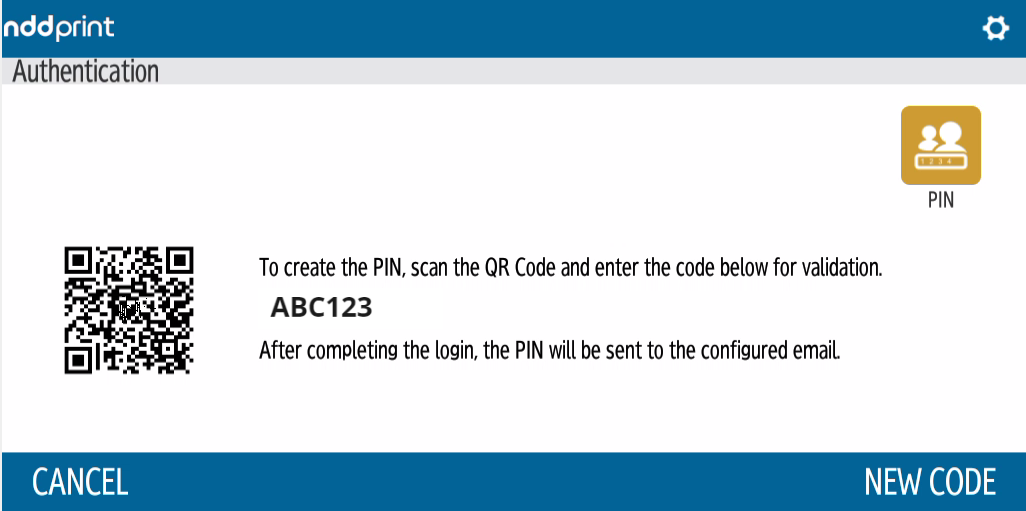
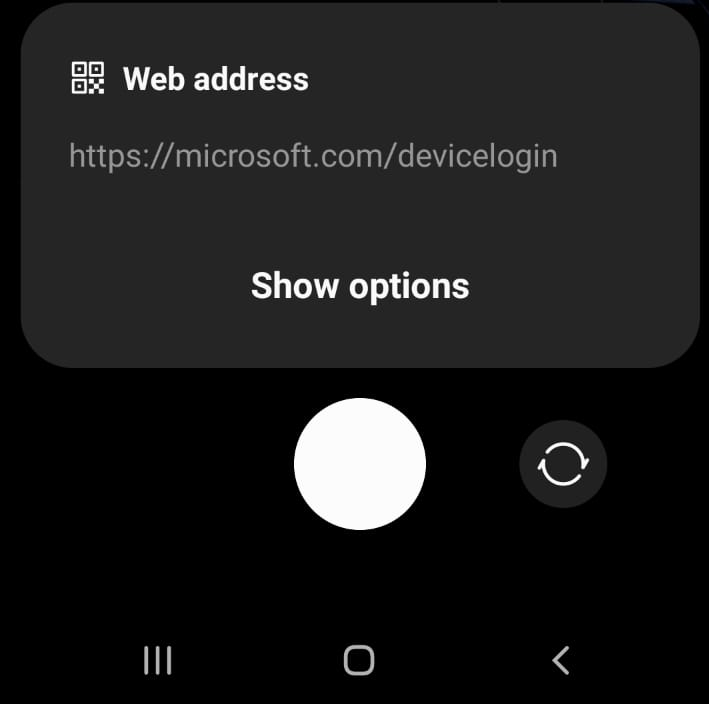
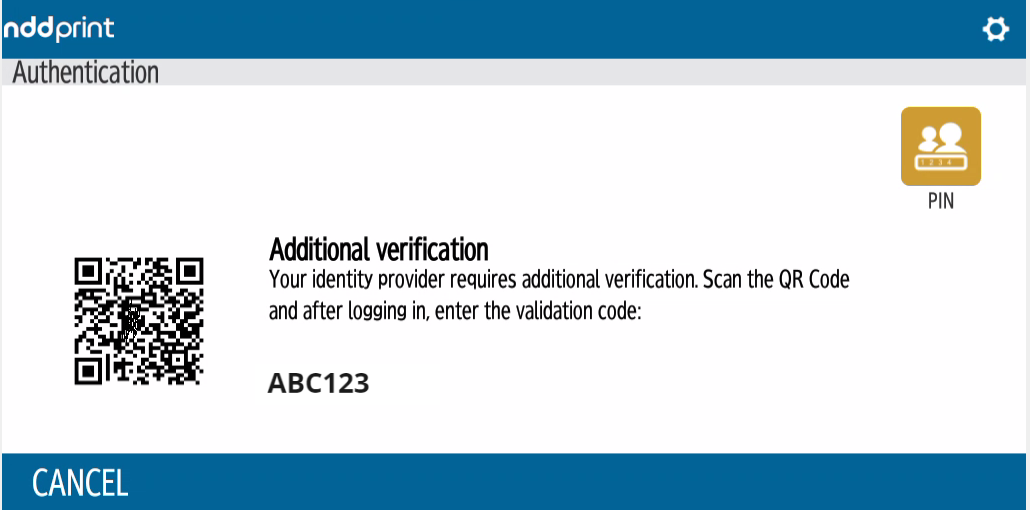
Scan QR code
Open the smartphone camera.
Scan the QR code displayed on the printer screen.
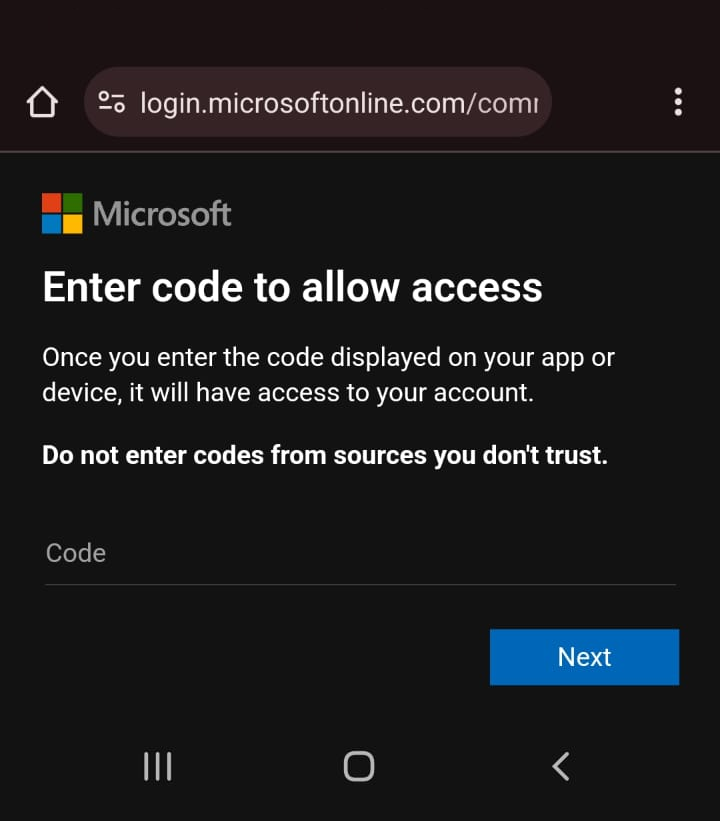
Redirection to Microsoft
At this point, the process will be carried out via the user's smartphone. After scanning the QR code on the printer screen, the user will be redirected to the Microsoft portal.
Enter the code provided
Enter the code that was provided on the printer screen.
Click ‘Next’ to confirm the code.
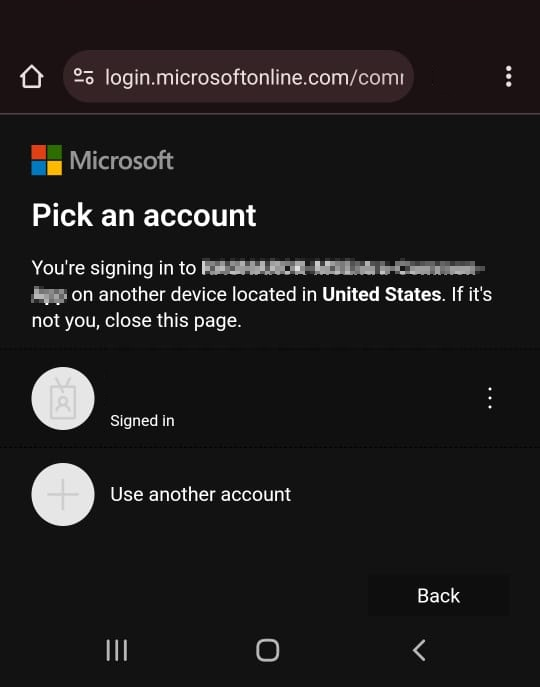
Code validation
After the code is validated, you will be asked to enter a Microsoft Entra ID domain account.
If the user is using a smartphone with an account already linked to the Microsoft Entra ID domain, simply select it to complete the process. Otherwise, you can go to Use another account and enter the email address of the desired account.
After completing the process, an email will be sent to the user's mailbox containing the PIN information created, allowing the user to authenticate themselves on the NDD Print Client installed on the equipment.
PIN synchronisation
In some cases, even after completing the PIN creation process, you may not be able to log in. In this case, a message on the printer screen will indicate that the PIN is being processed. We recommend waiting a few minutes before attempting to log in again.

Important
Due to Microsoft security requirements, additional checks will be requested whenever it is necessary to renew the PIN link with the user registered in the Microsoft Entra ID domain. The renewal period will be determined by the settings established by the domain administrator.
The process will follow the model previously described for creating the PIN, where the user must scan the QR code to be directed to the Microsoft portal, enter the code displayed on the printer screen and finish by linking the user to the Microsoft Entra ID domain.
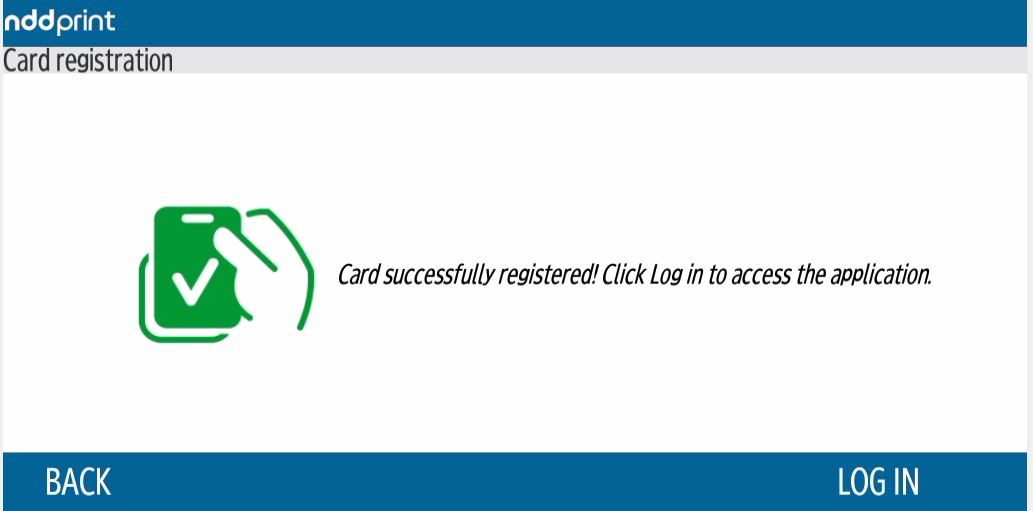
Physical identifier
For this type of authentication, there has been no change to the registration process. For this, access control must be configured in the NDD Print Host (Configure authentication ) to allow authentication by physical identifier. It is also necessary to enable the PIN code option, which will serve as a way to identify the user during the registration of the physical identifier.
Before starting
As Microsoft Entra ID does not support integration with user and password authentication, make sure that the user already has an associated PIN, as this will be required for identification when registering the physical identifier.
Physical Identifier Registration
Approach the Identifier
Approach the identifier to the reader.
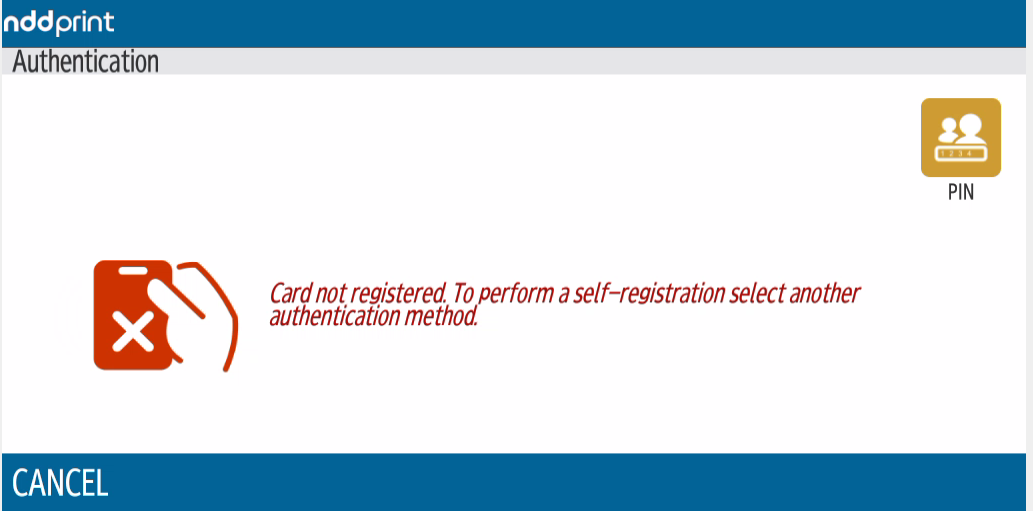
The user will be informed that the card is not registered and will be instructed to select another authentication method, such as the PIN code
Validate Access Data
After selecting the authentication method, enter the access data using the PIN code.
Then, bring the identifier close to the reader again to confirm the registration.