Add printer for accounting in NDD Print MF HP
In this article, you'll learn how to add printers for job accounting.
Printer Accounting methods
OXPd | In this accounting method, NDD Print MF HP searches for information in the Quota and Statistics Services that provide the data on the jobs carried out. |
|---|---|
SNMP | In this accounting method, NDD Print MF HP requests information on jobs carried out on the device that are located in its MIB. |
Web | In this accounting method, NDD Print MF HP searches for job data via the HTTP or HTTPS protocol in predefined locations on the device's web interface. |
CSV (log backup) | In this accounting method, NDD Print MF HP processes a CSV file that the device exports to a predefined folder. |
MFP 432 printers are only accounted for using the CSV (log backup) method.
Captured information
OXPd | SNMP | Log backup | Web | |
|---|---|---|---|---|
type | Available | Use standard value A4 | Available | Use standard value A4 |
User | Available | Available (native printer authentication) | Available | Available (native printer authentication) |
Duplex | Available | Accounted as Simplex | Available | Accounted as Simplex |
Color | Available | Accounted according to printer capacity | Accounted according to printer capacity | Accounted according to printer capacity |
Add the printer for accounting
Before you start
Make sure you carry out the Basic settings for NDD Print MF HP.
Perform a test print on new equipment for identification on the network.
Offline printers will only be configured when they are identified by NDD Print MF HP.
Step 1: Configure NDD Print MF HP
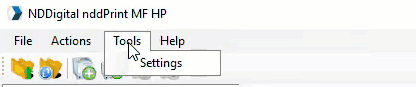
Open the NDD Print MF HP interface
In the menu, click on Tools > Settings
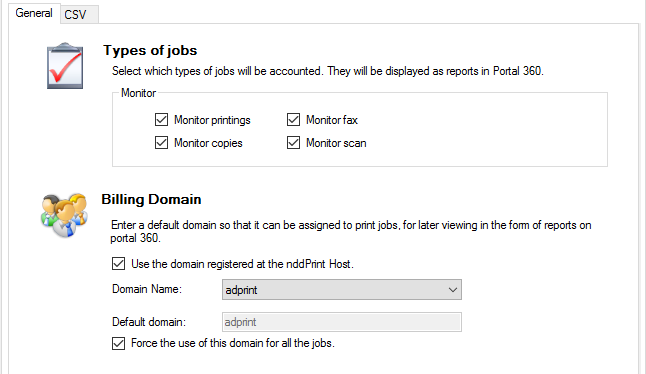
In the Accounting tab - Select the types of jobs you want to account for and configure the domain where the jobs will be registered
Step 2: Add printer
In Quick Actions, click on Add Printer

Click on Next
Enter the device data
Select the collection type according to your device's compatibility
If the printer is not accessible at the moment, you can click Yes to register it offline.
To configure CSV (Log Backup) accounting, select check Compatibility with embedded solutions and select None.
Click on Next
Wait for the wizard to finish adding the equipment and click Next and Finish
Create standard profiles and SNMP entries to optimize the addition of equipment.
Restart the printer
Printer status
You can check the status of the printers that have been added to NDD Print MF HP, which allows you to identify any addition problems.
SUCCESS - The printer has been added and configured correctly.
PENDING ADDITION - The printer has been added without communication and its settings are pending.
ERROR - The printer has been added, but its settings have not been made. Click on details to find out more.
Configure CSV (Log backup) accounting
Before you start
We recommend resetting the device to factory settings.
Make sure that the shared folder has been created on the server intended to receive the job log.
Step 1: Configure the printer
Access the device's web page
Go to Security > System security
Select the option Erase everything > Erase all content and settings
Click on Delete now
Step 2: Enable Work log
Access the device's web page
Go to Security > System log > Log configuration > Job log
Click on Activate
Step 3: Setting the system timeout
Access the device's web page
Go to Settings > Device configuration > System
Click on Configure
Uncheck the System timeout option
Step 4: Configure log backup
Access the device's web page
Go to Security > System log > Log configuration > Log backup
Log backup: check the Enable option
Schedule: choose the scheduling option and the time when the backup will be made
Protocol: select the SMB protocol
Server address: enter the server address to which the log will be sent
Server port: enter the port for communication (139 or 445)
Login name: enter the details of the user (name, password and confirm password) who will have access to the shared folder on the server. If there is no need to enter a user's details, check the Anonymous option
Domain: enter the address of the domain that will be used
Path: fill in this field as follows:
<shared_folder_name>\<equipment_serial>
Step 5: Configure NDD Print MF HP
Open the NDD Print MF HP interface
In the menu, click on Tools > Settings

Go to the Accounting > CSV tab
Server address: enter the address of the server where the log file is being saved
Port: select the desired port (139 or 445)
Domain: enter the address of the domain to be used
Login: enter the details of the user who will have access to the shared folder on the server
Password: enter the password of the user who will have access to the shared folder on the server
Confirm password: confirm the password of the user who will have access to the shared folder on the server
Path: Enter the name of the shared folder on the server where the log is being saved