Main interface
After performing the authentication, the user will be able to manage his documents through the actions illustrated as shown in the image below:
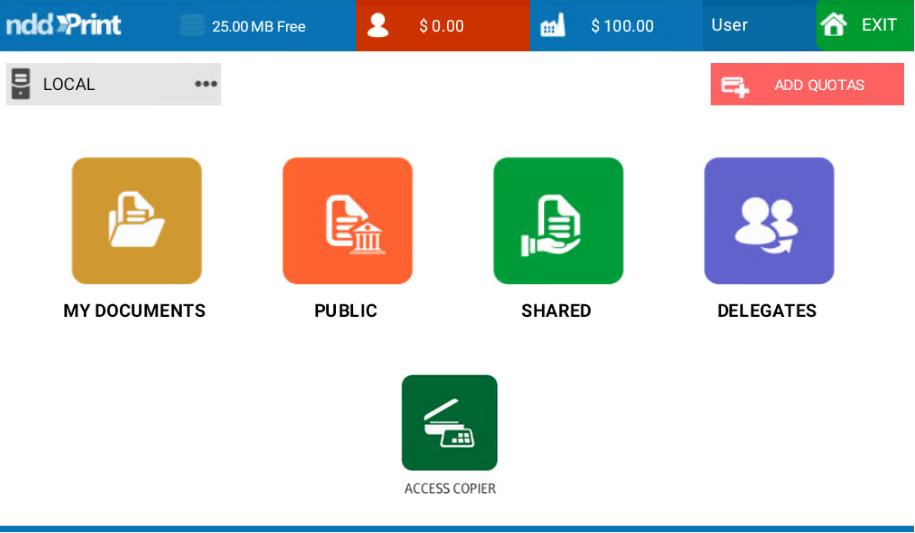
Status Bar
The status bar shows the information of the authenticated user:

Disk space quota, which shows the amount available to save documents
Quota balance for Private Finality
Quota balance for Corporate Finality
Authenticated user
End user session
ATTENTION
It may be that not all icons are available in the status bar depending on the settings made in the NDD Print solutions
TIP
The Save option must be enabled in the NDD Print Releaser module. For more information click here
For more information on configuring disk space limits, click here
For more details on finality management, see the NDD Print Portal 360 manual
Add quota
Enter your prepaid card code and click Confirm. After the code is validated, the credits will be added immediately to the existing ones.
TIP
For more information, refer to the NDD Print Portal 360 manual
Server selection
It is possible to change the view to another server when the trust relationship between sites in NDD Print Releaser is configured. This feature allows you to print, save or delete documents that have been sent to other servers.
When selecting a remote server, the NDD Print Client will use the settings of the selected NDD Print Releaser server, ie quotas for space and what is active, such as public, shared documents and permissions.
ATTENTION
If you have only one server, the Server Selection option will not be available
TIP
For more information, see the NDD Print Releaser user manual